
Here is an example of a process with a configured contract approval route.
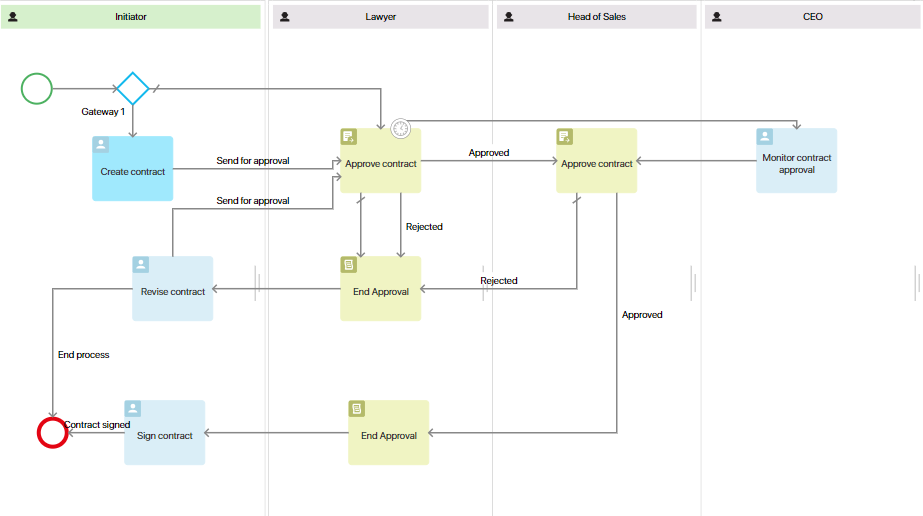
The process comprises the following steps:
- The initiator prepares the contract and sends it for approval to the legal team.
- Any member of the legal department can review the contract and either send it back for revision, attaching a version of the document with comments, or approve it. After making a decision, the approval task will be removed from other users, and the process can branch into several paths.
- If the contract is approved by the lawyer, it is sent for approval to the head of the sales department.
- If the document requires revisions, the initiator will receive a task to make the necessary amendments. The current approval gets closed. The contract will then be sent back for another round of reviews by the approvers, creating a new approval sheet.
- Once both the lawyer and the sales department head approve the document, the approval process concludes, and an approval sheet is generated. The initiator will receive a task to organize a meeting with the client to sign the contract.
- If the legal team doesn’t review the document within the given timeframe, the CEO will be assigned a task to monitor the approval.
Set up the first approval stage
The initial Approve Contract task has four outgoing connectors:
- Approved
- Rejected
- Monitor contract approval
- Default connector
The contract will be sent for approval to all lawyers simultaneously. However, as soon as one of the employees makes a decision, the task will be canceled for all other executors, and the current approval will end. To implement such approval logic, set up the task and conditions for the connectors.
- In the activity’s settings, select the option for parallel execution.
- Set up the Approved connector.
Double-click the connector and go to the Transition conditions tab. Add the condition Approval percentage > 0. This way, as soon as someone clicks Approve in the task, it will be canceled for all other approvers, and the process will proceed to the next step: approval by the head of the sales department.
- Set up the Rejected connector.
To ensure that only one employee completes the task, create the condition Rejection percentage > 0.
When approving, lawyers can add a new version of the contract with comments. In this case, the approval sheet will move to the archive, and the process will be interrupted.
To avoid ending the process, add another condition. Select the OR operator and the Approval sheet is archived value. For the operation, choose the equals symbol. In the Field Value column, click on <Undefined>, select Enter value, and check the box. This way, when adding a new document version, the process will follow the Rejected path.
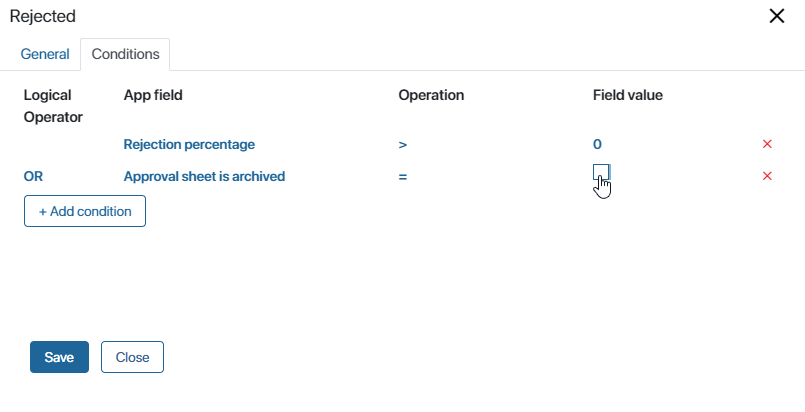
If one of the set conditions is met, the initiator will receive the Revise contract task, and the approval task will be canceled for other lawyers.
- Set up the Monitor contract approval connector.
Limit the execution time for the Approval task. If the lawyers fail to make a decision on time, the CEO will receive a monitoring task.
Open the block settings and go to the Deadline tab. Specify an exact time for the task, for example, 3 days, and in the Interrupt field, select the transition to the Monitor contract approval task. After saving the settings, this connector on the diagram will be marked with a clock icon.
- Set up the default connector.
To allow the process to continue if none of the conditions are met, a default connector must be specified.
You cannot set conditions for such a connector. Therefore, we cannot choose the Approved or Rejected branches. Add another connector and in the block settings mark it as the default connector. On the diagram, it will be depicted as an arrow with a diagonal line.
- Place the End approval element on the diagram after the lawyers’ task. This way, if an employee sends the contract back for revision, an approval sheet will be generated with the Rejected decision.
Set up the second approval stage
The second Approve contract task is located in the swimlane with a single executor. This means that the parallel or sequential approval setting does not apply to it.
For the Approved connector, set the condition Approval percentage > 0. The process will follow this branch only if the department head approves the document. The Rejected connector for this task will serve as the default connector.
After the second task, you also need to place the End approval element, so the initiator sees the decision in the approval sheet when signing the contract with the counterparty.
Save and publish the configured process.
Found a typo? Highlight the text, press ctrl + enter and notify us