
In the interface designer, you can work on the Template, Context, Scripts, History, Settings, and Files tabs.
Template
On the Template tab, you will fill the interface with widgets and customize the appearance of pages and forms.
To add a widget, drag it to the modeling canvas and customize it. You can use standard widgets, and you can also create your own custom widgets.
Standard widgets are grouped by type. Depending on what item of the system you are customizing, a page or a form, you will have a specific set of widgets available to you. For example, you cannot add widgets intended for the form sidebar to pages. Forms, on the other hand, cannot have widgets intended for pages.
To create a custom widget, combine the standard widgets with each other. For example, you can add a Panel with header, place Columns in it, and in one of the columns add a Table with a report. Save the widget, and you can use it later when customizing other interfaces.
To learn how to place widgets on the canvas, see the Add a widget to a page and Form templates articles.
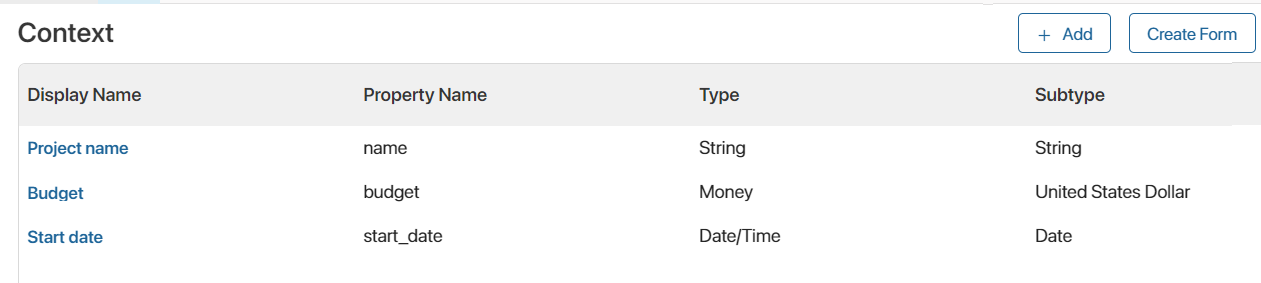
Context
On the Context tab, you can add properties that can be placed on the modeling field and used in scripts. To create a property, click + Add and specify its parameters. Read more about properties and how to add them in the Context tab, System data types, and Context types articles.
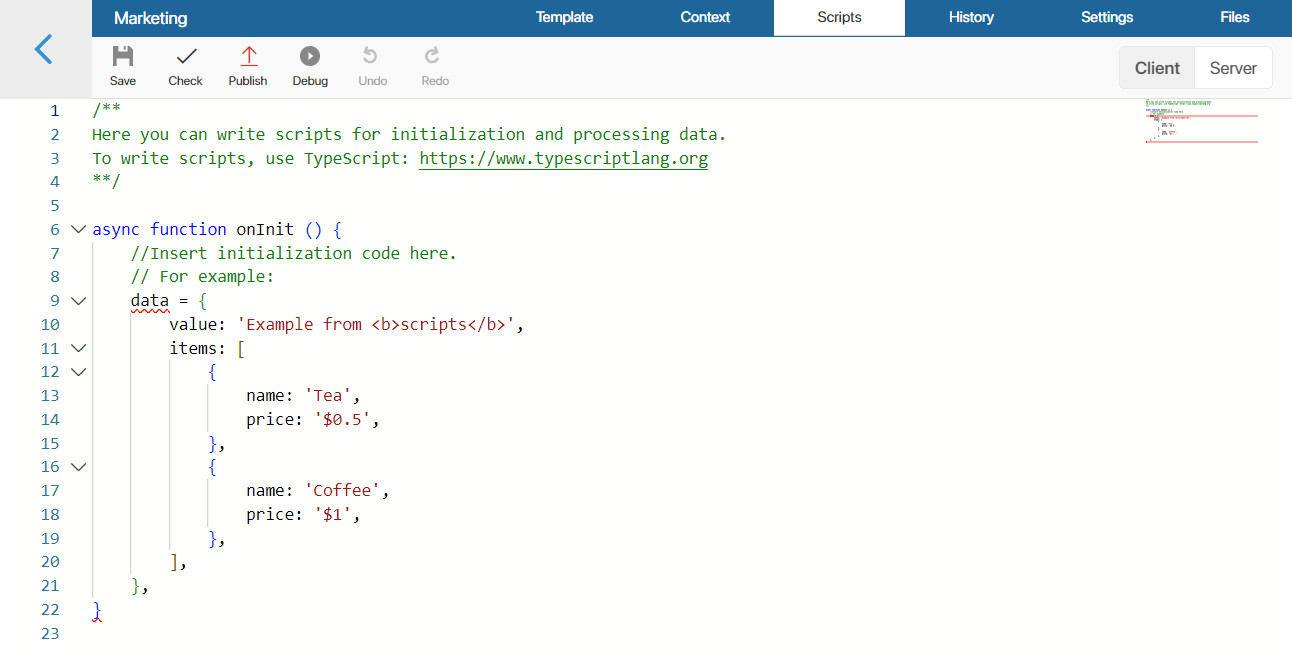
Scripts
On this tab, you can write scripts for data processing to use them in widget settings. For example, you can use a script to display current exchange rates on the page or create a page header that will change depending on the current date.
You can also customize the behavior of widgets, for example, to show a popup window when the user hovers over a certain area of a form or page. Read more about it in the Scripts in widgets article.
History
Once you have made changes to the interface of a form or page, they must be published so that the new settings are available to users. All published versions of the interface will be displayed on the History tab with the author, time, and comment.
On this tab, you can restore a previous version of the interface. To do this, select a title in the list, click Apply Version in the upper right corner of the page, and confirm the action.

The settings of the selected version will be applied to the current draft of the interface opened on the Template tab. All saved but not published changes will be lost.
You can edit the restored version of the form or page, and change the layout or widget settings. To apply the interface and make it available for users, click Save and Publish on the top panel of the designer again.
Settings
On this tab, you can:
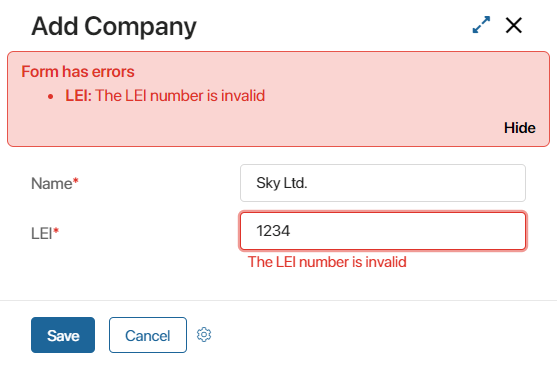
- Hide the widget with validation errors if you’re setting up a form.
- Make it possible to display the widget on the top panel or sidebar if you’re setting up a custom widget.
- Set system functions.
- Allow the use of the following in the widget:
- Global objects.
- Elements of the current workspace.
- Objects and variables from selected workspaces or custom modules with which optional dependencies are established. This capability is a useful option for solution development, as in this case, the widget can be exported without limitations.
Main
If you are customizing the creation or editing form of an app item, task, or start event, you can use the Hide widget with validation errors option. Select the checkbox to display validation errors only under incorrectly filled fields. If the option is disabled, the widget is displayed at the top of the form and lists all errors.
When you create a custom widget on this tab, you can control its placement within other interfaces. By default, a custom widget can only be added to the main part of the form. You can enable the following options:
- Display widget in the form header with buttons. Check the box to allow the widget to be placed on the top panel of any form.
- Display widget in the sidebar. Check the box to allow placing the widget in the sidebar of any form.
System functions
Here you can select the functions you want to apply when displaying the widget or validating the form. It is optional to specify functions on this tab.
By default, the following functions are executed if they are defined in scripts:
- onInit() when initializing the widget.
- canRender() when checking the conditions for displaying the widget.
- onLoad() when the rendering of the widget is completed.
You can replace these functions with other functions to customize the execution of additional actions, for example, loading and preparing data for displaying in the widget. To do this, select a function or create one in the Initialization, Rendering, or Rendering finished fields.
You can also select a function to perform custom validation that makes sure that the form is filled out correctly. By default, no function for validation is set. In this function, you can implement additional checks to the already existing standard validation when the user tries to save the form. For example, define checks for form field values.
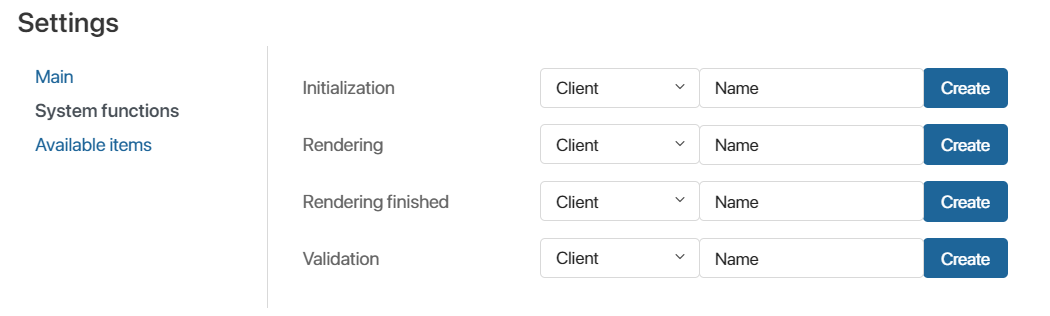
To specify a function from your scripts, select Client or Server and specify its name.
You can proceed to create a script by clicking Create. Then specify the name of the function and click Save. After that, go to the Scripts tab by clicking Open. To learn more about creating a script on the Client or Server side, read the Scripts in widgets article.
Available items
You can enable access to additional items from other levels to use them for creating the interface.

- Allow using of all items. To enable access to global constants and widgets from other workspaces, check this box. Then you can use variables contained in workspaces and global parameters when writing scripts. Note that using global constants and widgets from other workspaces restricts the ability to export an app or workspace.
- Allow using all items in the workspace. To allow access to objects and widgets of the current workspace, check this box.
Read more about using scripts in ELMA365 TS SDK.
Files
On the Files tab, you can add JavaScript libraries and custom functions to access them in client-side scripts.

Found a typo? Highlight the text, press ctrl + enter and notify us