
Вы можете настроить внешний вид таблицы и функциональные возможности, доступные пользователям при работе с ней. Для этого в настройках формы приложения выберите поле типа Таблица и нажмите Настройка таблицы.

В открывшемся окне можно:
- задавать общие параметры таблицы — регулировать ширину и высоту строк, управлять нумерацией, группировкой данных и т. д.;
- настраивать работу с колонками таблицы — определять порядок расположения колонок, их ширину, видимость данных и обязательность заполнения. Для каждой колонки можно указать заголовок, способ сортировки данных и другие параметры.
Общие настройки таблицы
Общие настройки применяются ко всей таблице. Доступны следующие опции:

- Таблица по ширине окна или Произвольно — включите опцию Таблица по ширине окна, если нужно отображать таблицу на полную ширину страницы. Размеры колонок задаются в процентах от этой величины. Выберите Произвольно, чтобы задать точные размеры колонок в пикселях. На странице общая ширина таблицы будет равна сумме размеров её колонок;
- Минимальная высота строки в пикселях (не меньше 35) — для выравнивания таблицы задайте высоту её строк. Минимальное значение — 35 пикселей;
- Отображать порядковый номер в начале строки — в таблице появится дополнительная колонка с номером строки, которая заполняется автоматически;
- Разрешать удалять строки с ячейками, доступными только для чтения — включите опцию, чтобы пользователи могли удалять строки таблицы, в которой есть колонки только для чтения. Предположим, в таблице Спецификация заказа есть недоступные для редактирования ячейки. В них передаются данные из приложения Заказы. Остальную информацию менеджер заполняет вручную. При включённой опции менеджер сможет удалять строки в таблице с заказом, например, если внёс неверные данные;
- Группировать строки таблицы — настройка позволяет структурировать данные в таблице и отображать их в удобном для пользователя виде:
- в поле Группировка по колонке укажите колонку, по значениям в которой нужно сгруппировать строки таблицы;
- с помощью опции Направление сортировки группы в таблице можно расположить по убыванию или возрастанию общего значения. Если группировка выполнялась по строковым данным, то сортировка производится по алфавиту.
Обратите внимание, если для колонок таблицы включена опция Сортировка, группировать строки нельзя. В появившемся окне оповещения выберите, какую опцию оставить активной.
- Отображать новую версию таблицы — позволяет применить обновлённый внешний вид таблицы и расширенную функциональность. Начиная с версии системы 2026.1 опция включена по умолчанию. В более ранних версиях поставок ELMA365 On‑Premises активируйте её. После этого в настройках таблицы станут доступны дополнительные опции;
- Запретить добавление строк — отметьте опцию, чтобы пользователи не могли добавлять строки во время редактирования таблицы;
- Показывать количество записей — включите опцию, чтобы в левом верхнем углу таблицы выводить общее число строк;
- Включить пагинацию — отметьте опцию и выберите, как отображать в таблице большое количество данных:
- Постранично — данные размещаются на нескольких страницах;
- Загрузка при прокрутке — опция доступна при выключенной группировке строк. Записи загружаются при пролистывании таблицы вниз.
В появившемся поле Количество записей на странице* укажите, сколько строк будет выводиться в таблице на каждой странице или при одном пролистывании.
Настройки колонок
Индивидуально для каждой колонки можно настроить:
Ширина
В зависимости от значения опции Таблица по ширине окна/Произвольно размер колонки задаётся в процентах от ширины страницы или в пикселях. Чтобы задать произвольную ширину столбца, потяните за его границу.

Ширину колонки можно устанавливать автоматически по содержимому. Для этого нажмите на значение ширины в колонке и выберите доступный вариант:

- Растянуть по максимуму — настройка доступна при выборе опции Таблица по ширине окна. Ширина выбранной колонки будет максимально увеличена за счёт сжатия остальных. После выбора опции значение ширины в столбце сменится на max;
- Сжать до минимума — настройка доступна при выборе опции Произвольно. Ширина колонки будет уменьшена до размера самого большого элемента в столбце. После выбора опции значение ширины в столбце сменится на min.
Внешний вид
Вы можете добавить сплошную заливку для колонок, а также изменить расположение, цвет текста, использовать подчёркивания, курсив и полужирный шрифт. Для этого нажмите значок шестерёнки рядом с названием колонки. В открывшемся окне переключайтесь между опциями, чтобы отформатировать текст, как вам нужно.

Видимость
Вы можете скрыть заголовки и футеры у всех колонок таблицы. Для этого слева от таблицы нажмите значок ![]() . Чтобы сделать видимой ранее скрытую колонку, нажмите значок
. Чтобы сделать видимой ранее скрытую колонку, нажмите значок ![]() .
.
Опции «Только для чтения» и «Обязательно для заполнения»
Вы можете настроить заполнение данных в колонках таблицы с помощью опций:

- Только для чтения — над заголовком колонки нажмите значок
 , чтобы пользователь не мог изменять данные в колонке.
Если в таблице есть колонки, недоступные для редактирования, по умолчанию пользователь не может удалять в ней строки. Чтобы это изменить, в настройках таблицы включите опцию Разрешать удалять строки с ячейками, доступными только для чтения; - Обязательно для заполнения — нажмите значок звёздочки, чтобы пользователь не мог сохранить изменения в таблице, пока все ячейки колонки не будут заполнены. Чтобы отменить обязательность заполнения, нажмите значок звёздочки повторно.
Подробнее о том, как настроить отображение таблицы в расширенном режиме настройки форм, а также на формах виджетов, страниц и процессных задач, читайте в статье «Настройка отображения таблицы на формах».
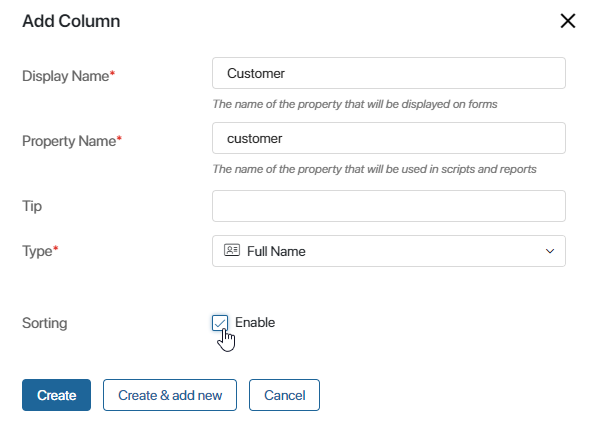
Сортировка
Вы можете сортировать данные в колонках по возрастанию и убыванию, а также по алфавиту. Сортировка доступна для колонок следующих типов: Число, Дата/Время, Деньги, Строка, Пользователи, Приложение, Телефон, ФИО и E‑mail.
Чтобы включить сортировку в колонке, при её создании или редактировании установите флажок в поле Сортировка.

Обратите внимание, при включённой опции Группировать строки таблицы сортировка данных в колонке недоступна. В появившемся окне оповещения выберите, какую опцию оставить активной.
После включения сортировки на форме просмотра нажмите на заголовок колонки, чтобы поля располагались по возрастанию данных. Повторное нажатие отсортирует данные по убыванию. Чтобы сбросить сортировку, нажмите на заголовок поля ещё раз.
Функциональные возможности новой версии таблицы
С версии системы 2026.1 по умолчанию применяется расширенная функциональность с дополнительными опциями и улучшенным внешним видом.
Чтобы использовать изменения в более ранних версиях поставок ELMA365 On‑Premises, в общих настройках отметьте опцию Отображать новую версию таблицы. Опция доступна после включения фича-флага front_enable_vtable. Подробнее читайте в статьях «Изменение параметров ELMA365 Enterprise» и «Изменение параметров ELMA365 Standard».
В новой версии таблицы пользователям доступны следующие функциональные возможности:
- Во время заполнения таблицы можно открыть контекстное меню строки и добавить строки выше или ниже текущей, а также удалить строку.

При этом в настройках таблицы можно запретить пользователям добавлять новые строки.
- В колонке с данными типа Приложение можно не только выбрать элемент в ячейке, но и добавить новый, используя кнопку + Создать. Для этого в настройках колонки отметьте опцию Кнопка для добавления нового элемента.

- Можно изменять порядок расположения строк в рамках одной таблицы методом Drag-and-Drop. Для этого в названии строки зажмите значок
 и перетащите её вниз или вверх.
Если в таблице включена группировка строк, перемещать строки можно только внутри одной группы. Перенос строк между группами недоступен. - Если в таблице много данных, просмотреть их можно, переключаясь между страницами или пролистывая таблицу вниз. Администратор системы настраивает способ отображения данных в общих параметрах таблицы.
- Если вынести переменную типа Таблица на шаблон формы в дизайнере интерфейсов, вы можете привязать скрипт к действиям пользователя с определёнными данными таблицы. Например, автоматически заполнить одни ячейки таблицы, когда сотрудник укажет значения в отслеживаемых ячейках. Подробнее читайте в статье о настройке событий таблицы.