
When you import a ready-made solution from a .e365 file, you add all of its components to the system: modules, workspaces, apps, pages, custom widgets, separators, links, business processes, scripts, etc. If the solution contains modified system workspaces, similar workspaces and their components, such as apps and business processes, will be updated in your company after installation.
To import the solution:
- Proceed in a way that is convenient for you:
- On any page of the system, click the
 icon in the left menu, and in the opened window, click Solutions. Then click +Add solution and select Upload file.
- On any page of the system, click the
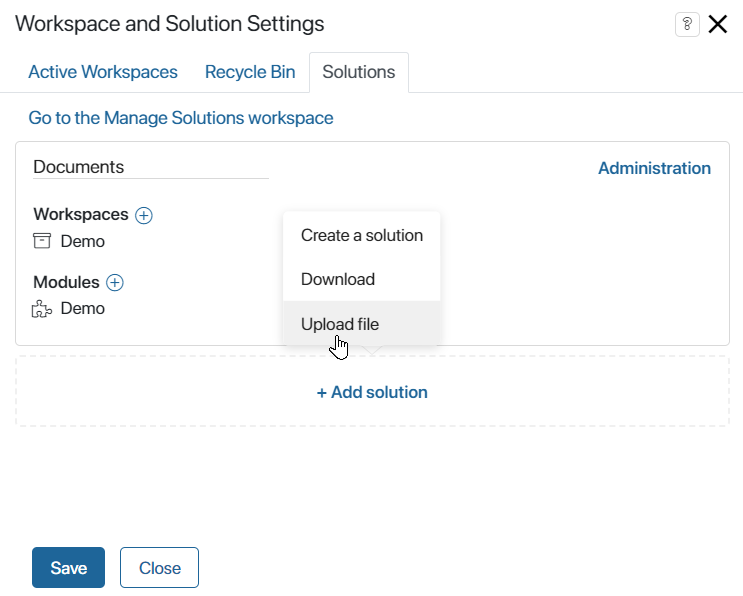
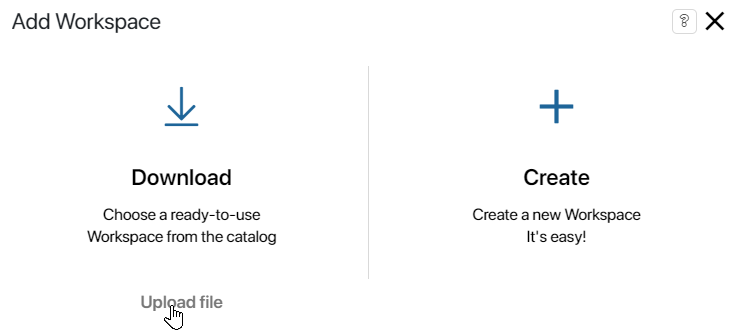
- On any page at the bottom of the menu, click the icon
 . In the opened Add Workspace window, select Upload file.
- In Administration > Solutions, click +Solution and in the opened window, select Upload file.
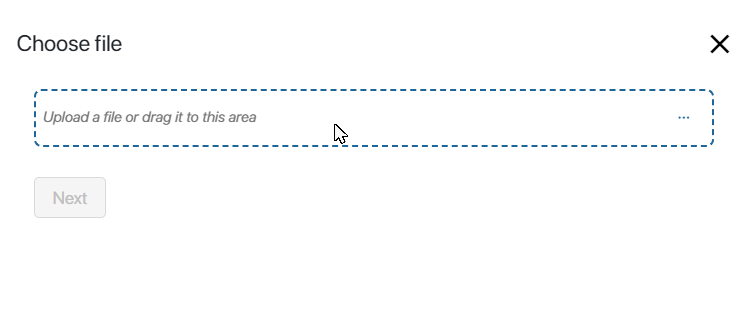
- Select the .e365 file from your local computer or from your system files and click Next.
If the solution was installed earlier, you can proceed to update it. To do this, click Continue in the opened window.
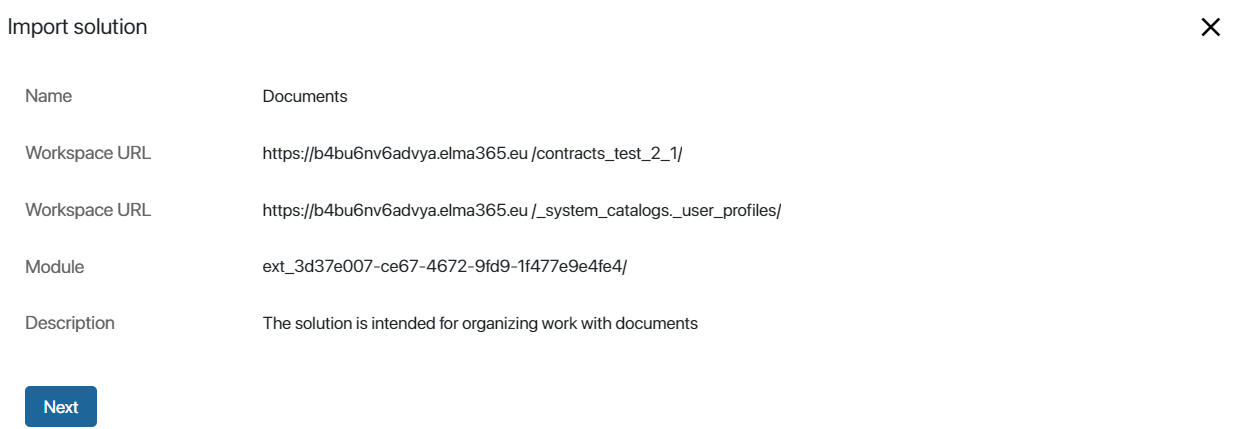
- In the opened window you can see the links to the imported workspaces and their apps, as well as a description of the solution. Click Next to continue the installation.
The imported solution will be checked for errors in each of its components. The structures of custom groups and fields are checked, as well as links in fields of the App type to workspaces and apps added to the solution, the presence of duplicate pages is detected, etc.
If an error is found as a result of the check, you will see a notification. The solution cannot be imported into the company.
In addition, the imported solution is checked for dependencies installed during export with components from other solutions.
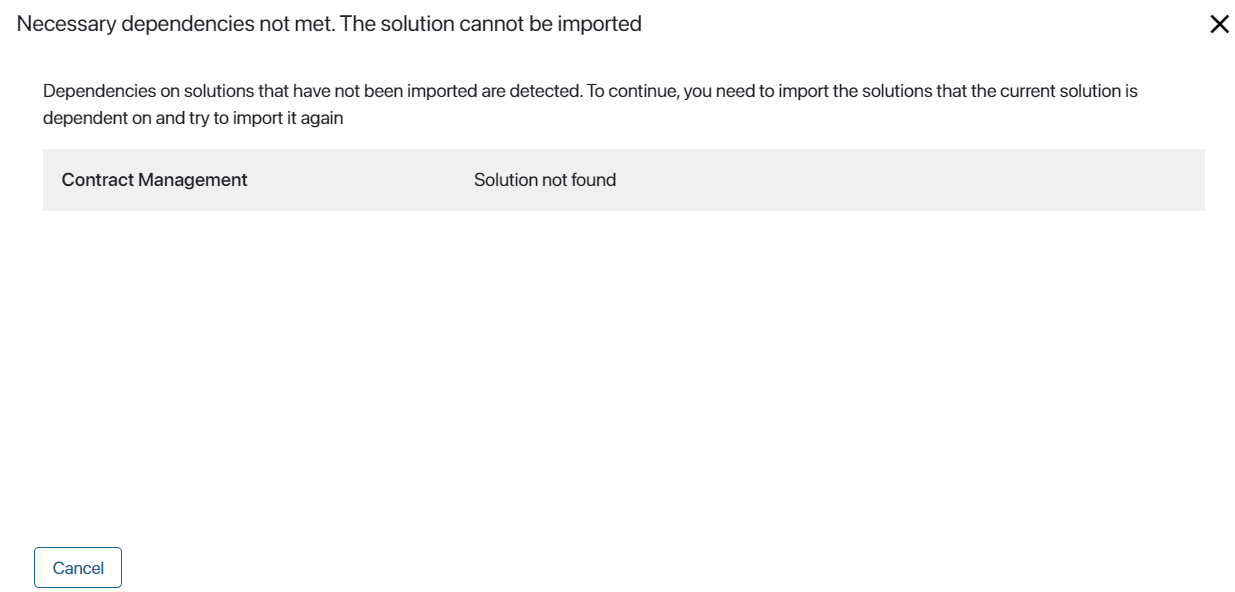
If the imported solution includes apps, widgets, or business processes whose fields reference apps from licensed system solutions, you will see a notification about it. You can complete the solution import, but you will need to activate the license of the used system solution to work with it correctly.
- If the solution is installed successfully, click Close.
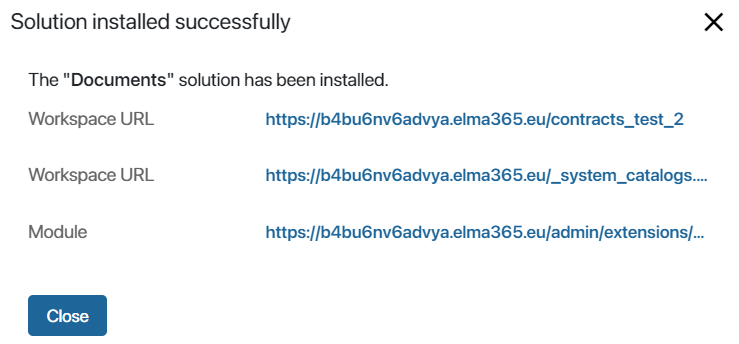
The components included in the solution will be added to the company. The modules will be displayed in Administration > Modules, the workspaces will be available in the left menu. At the same time, system workspaces will be updated, for example, additional properties will be added to the app context, and new versions will be created for forms, widgets, and business processes.
The solution and its components are locked during import. This means that users will be able to work with them, but will not be able to edit them.
To edit components, you need to unlock the solution. You can then delete and edit components. You can also restore previously customized or original versions of forms and widgets, as well as business processes.
Found a typo? Highlight the text, press ctrl + enter and notify us