
Шаблоны ответов — это группа справочников внутри раздела Линии. В ходе работы с запросами пользователей операторы могут наполнять справочники записями, содержащими ответы на часто задаваемые вопросы.
Использование справочников позволит оператору быстрее отвечать на типовые запросы пользователей. Для этого необходимо выбрать готовый ответ из списка и отправить его пользователю.
В справочники Шаблоны ответов входят два приложения:
- Статьи — состоит из записей, которые содержат ссылки на веб-ресурсы вашей компании, например, на сайт или справочные материалы.
Если у вас установлено бизнес-решение Service Desk, статьи из его базы знаний также будут доступны оператору для быстрых ответов пользователю линий;
- Шаблоны — содержит список готовых ответов на типовые вопросы пользователей.
Создать статью или шаблон ответа
Поскольку справочники Шаблоны ответов являются приложениями, для них доступны три способа создания элементов: вручную, с помощью Web API или импорт из файла.
В этой статье рассмотрим, как добавить запись вручную. Для этого:
- В разделе Линии откройте нужный вам справочник и нажмите кнопку +Название элемента, например, +Статья.
- В открывшемся окне заполните поля:
- для приложения Статьи:
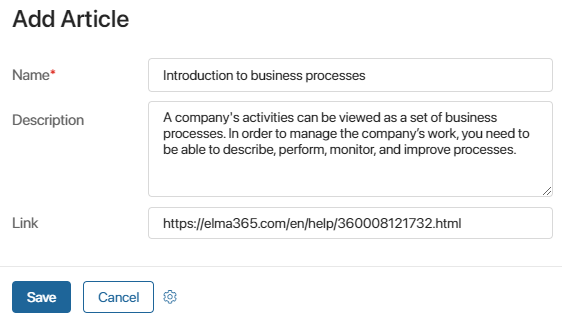
- Название* — укажите название новой статьи;
- Описание — добавьте информацию о прикрепляемой ссылке. При выборе оператором статьи описание отобразится в поле для ввода вместе с ссылкой;
- Ссылка — укажите адрес сайта;
- Файлы — пользовательское поле типа Файлы, которое создаётся администратором системы при настройке формы приложения Статьи. В это поле вы можете добавить сопроводительные файлы к статье;
- для приложения Шаблоны:
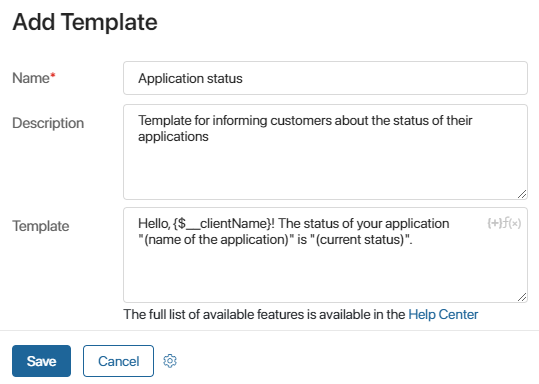
- Название* — укажите название нового шаблона;
- Описание — добавьте пояснительную информацию о шаблоне;
- Шаблон — введите текст сообщения, который оператор будет отправлять пользователю. В текст шаблона можно включить контекстные переменные. Например, переменную, в которой хранится имя клиента или название линии. Для этого нажмите значок {+} в правом углу поля. Также вы можете добавить в шаблон функции, например, DateTime(), нажав значок f(x). Доступна вставка изображения в текст сообщения с помощью функции
PasteImage(). Об особенностях и ограничениях её использования в шаблоне читайте в примере ниже.
При выборе шаблона в переписке с клиентом значения из переменных будут автоматически подставляться в сообщение оператора. Подробнее про другие функции смотрите в статье «Синтаксис шаблонов»; - Изображение — пользовательское поле типа Изображение (один), которое создаётся администратором системы при настройке формы приложения Шаблоны. В этом поле можно сохранить изображение, чтобы отобразить его в тексте сообщения;
Пример добавления изображения в текст сообщения с помощью функции PasteImage()
Рассмотрим, как добавить изображение в шаблон сообщения:
Где укажите вместо:
Функция
Теперь в линии с подключённой электронной почтой или LiveChat, а также во внутренней линии оператор может применить этот шаблон и отправить клиенту сообщение с изображением.
|

- Файлы — пользовательское поле типа Файлы, которое создаётся администратором системы при настройке формы приложения Шаблоны. В это поле вы можете добавить сопроводительные файлы к сообщению.
- Нажмите кнопку Сохранить.
Созданные записи в справочниках Статьи и Шаблоны могут отображаться в виде таблицы или плиток.
Также в приложении Статьи настроен иерархический справочник, в котором по умолчанию находится папка Все записи. Вы можете добавить другие папки, чтобы сгруппировать записи по категориям. Подробнее об этом читайте в статье «Дерево папок в иерархическом справочнике».
Применить статью и шаблон для ответа
В диалоге с клиентом оператор может не набирать вручную сообщение пользователю, а выбрать запись из справочника для быстрого ответа. Тогда в поле для ввода отобразится готовый шаблон ответа.
Чтобы выбрать запись, выполните следующие действия:
- На странице сессии в поле ввода сообщения нажмите значок
 и выберите приложение Статьи или Шаблоны.
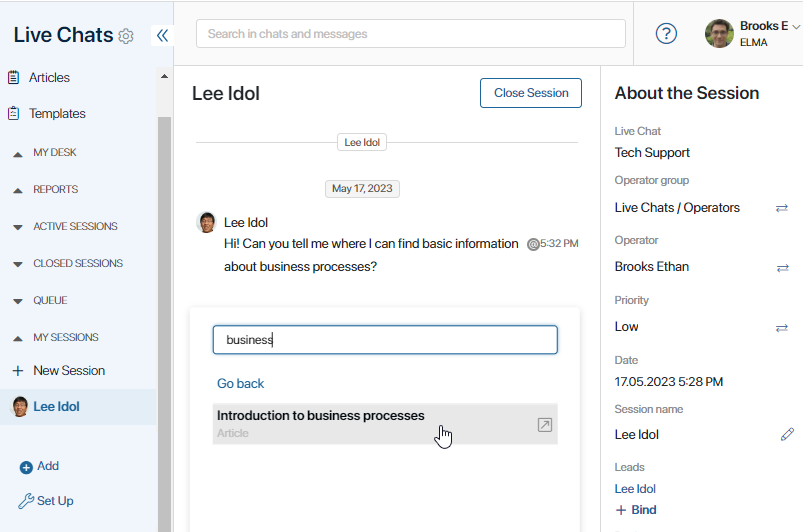
- Появится список элементов выбранного приложения. Чтобы быстро найти нужный вариант ответа, введите запрос в поле поиска над списком и нажмите кнопку Enter. Отобразятся подходящие записи.
- Выберите запись. Статья подставится в поле ввода вместе с данными из поля Описание, а шаблон — без них.
В тексте шаблона могут содержаться:
- файлы — в открывшемся окне загрузки выберите те из них, которые хотите добавить к ответу. Вы можете:
- отправить все файлы;
- оставить один или несколько нужных файлов. Чтобы открепить файл от сообщения, напротив его названия нажмите значок крестика;
- отменить загрузку файлов, нажав кнопку Отмена, и отправить сообщение без них;
- изображения — если в текущем канале его отправка в тексте не поддерживается, вы увидите предупреждение об этом. Чтобы использовать шаблон, удалите из текста изображение. Вы также можете сохранить его и приложить к сообщению с помощью значка скрепки в окне ввода.
- Подставленный ответ можно отредактировать вручную и отправить пользователю.
